Time Entry
Application Description
Time Entry is designed for Microsoft Dynamics 365 Business Central’s Jobs and Manufacturing modules and provides users with the ability to accurately record labor on a production order or job.
The add-on comes with an easy-to-use Role Center that is optimized for mobile devices to allow clocking-in and -out using the built-in barcode scanner. User can first scan their batch and then the production or job traveler to clock-in to a Job Task or Operation.
Time Entry provides real time data allowing an employee to clock in on one terminal and clock out at a different terminal. Data is moved to the approval worksheet and must be approved by the system manager before posting. The software is designed to keep the process as simple as possible while still giving editing control to the system manager.
Features
- Assure accurate time tracking in order to improve budgeting of jobs and production orders
- Use barcode scanner to identify employees and clock-in to production orders and jobs
- Review and approve recorded time entries
- Who is working screen allows production managers to efficiently manage their shop floor teams
Application Setup
All necessary settings can be defined from the Time Entry Setup page. Use the search icon, enter Time Entry Setup, and then choose the related link.
General
In the Time Entry Setup the general settings for the application can be defined.
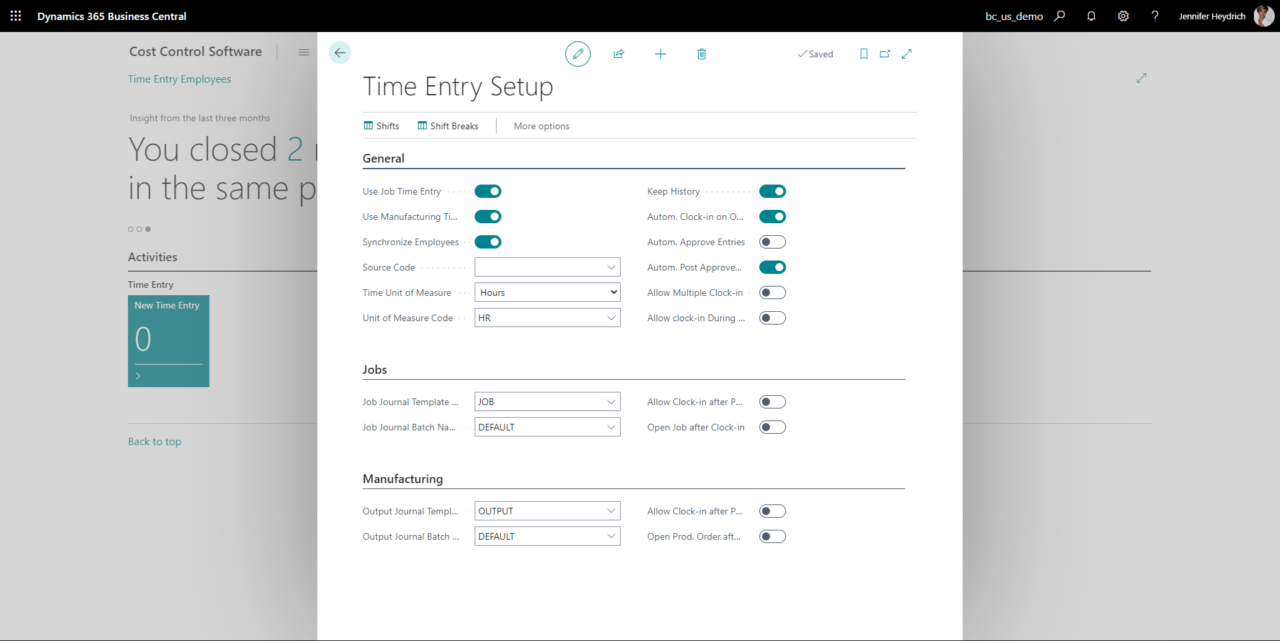
The list below shows the different settings available in the General tab of the Time Entry Setup. Each setting works for both modes of Time Entry, Jobs and Manufacturing:
| Setting | Description | |
Synchronize Employees |
Synchronize Time Entry Employees from Employee module. | |
Source Code |
Source code to be used for Time Entry transactions. | |
Time Unit of Measure |
The unit of measure to be used for Time Entry transactions. | |
Unit Measure Code |
The unit of measure code for hours. | |
Keep History |
Indicates if the Time Entry transactions should be kept and archived. | |
Autom. Clock-in on Operation Scan |
Defines if the system should automatically clock in after the Operation has been scanned or entered. | |
Autom. Approve Entries |
Defines if time entries should automatically be approved | |
Autom. Post Approved Entries |
Defines if the approved time entries should automatically be posted through the Job or Output Journal. | |
Allow Multiple Clock-in |
Allows user to clock-in to multiple production orders at a single time. | |
Allow Clock-in during Off-time |
Allows user to clock-in during Off-time. | |
Jobs
Check Use Job Time Entry to enable Time Entry for Jobs. This will allow you to define Job Journal Template Name and batch you want to use for time entry postings. Check or leave unchecked the Settings ‘Allow Clock-in after Prior Task Finished’ and/or ‘Open Job after Clock-in’ as needed.

Manufacturing
Check Use Manufacturing Time Entry to enable Time Entry for Manufacturing. Check the desired Settings, ‘Allow Clock-in after Prior Operation Finished’ and/or ‘Open Prod. Order after Clock-in’.

Shifts
Time Entry Shifts can be defined to prevent clock-ins outside of a defined shift or during shift breaks as well as to automatically clock-out at the End of a shift. Click Shifts in the Time Entry Setup to define the working hours of each shift. Create a new entry by selecting +New, or edit an existing entry by selecting Edit List.

Shift Breaks
Click on Shift Breaks in the Time Entry Setup to define the predefined break times for each shift. Create a new entry by selecting +New, or edit an existing entry by selecting Edit List.

Application Workflow
This section describes the workflow of the Time Entry add-on starting with the creation of a new employee up to approvals and the management of who is working on what production order.
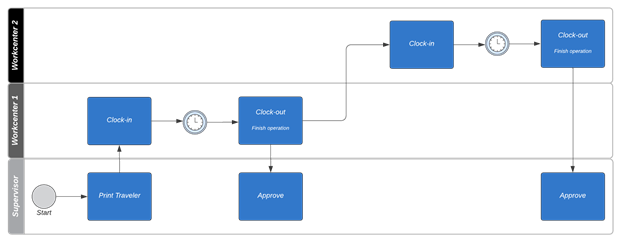
Overview
The flowchart below shows a typical Time Entry process with two work centers working on two different operations of a production order. The preparation of the production order as well as approval of the time entries is done by the supervisor or production manager.
Employees
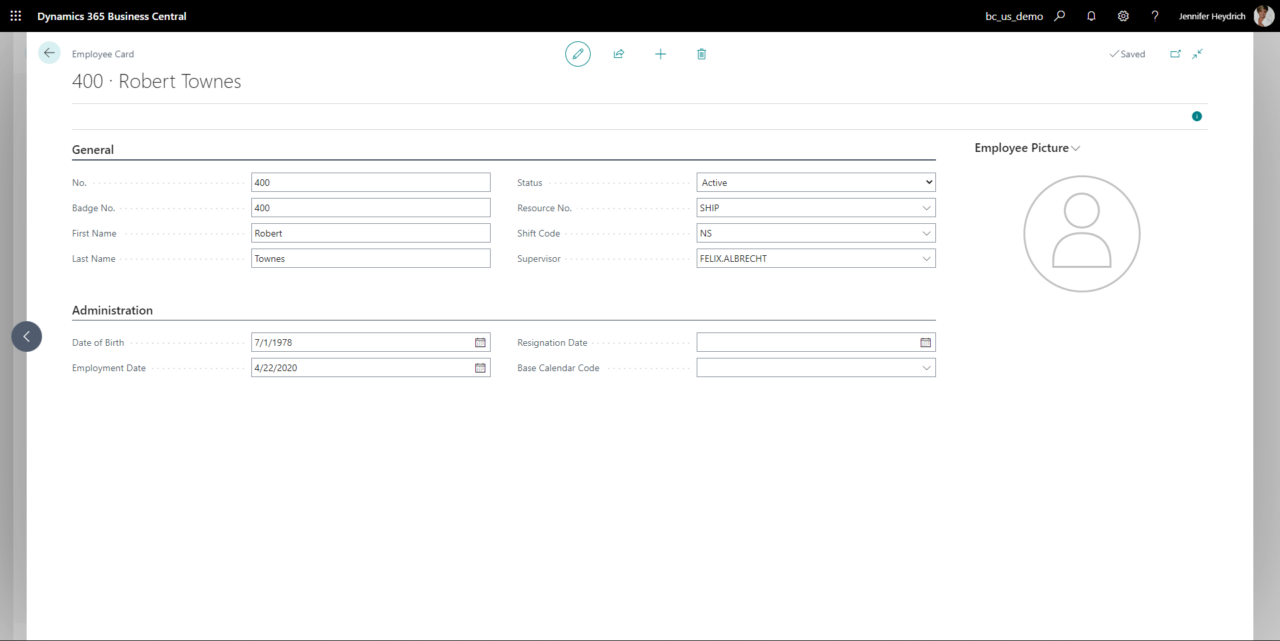
For each employee that should record time using the Time Entry add-on a Time Entry Employee needs to be created. To do so chose the search icon, enter Time Entry Employees, and choose the related link to open the employees list.
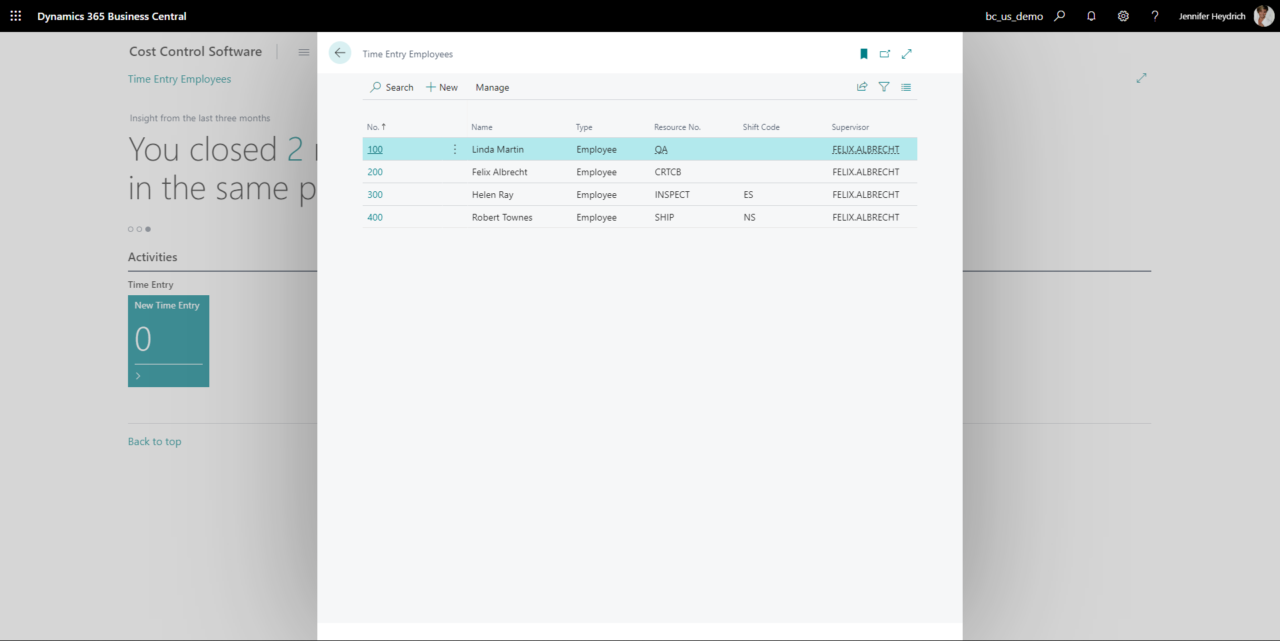
Create a new entry by selecting + New, or edit an existing entry by selecting Edit. Note: if employees are synchronized from the Employee table, Time Entry Employees don’t need to be created manually. Enter the desired barcode for each employee in the Badge No. field. In the field Supervisor, the direct supervisor of the employee can be defined. This will be used for the Who is Working screen. By choosing a Resource No. you indicate the resource associated with the ID. Holds the costs associate with the employee.
Clock-in
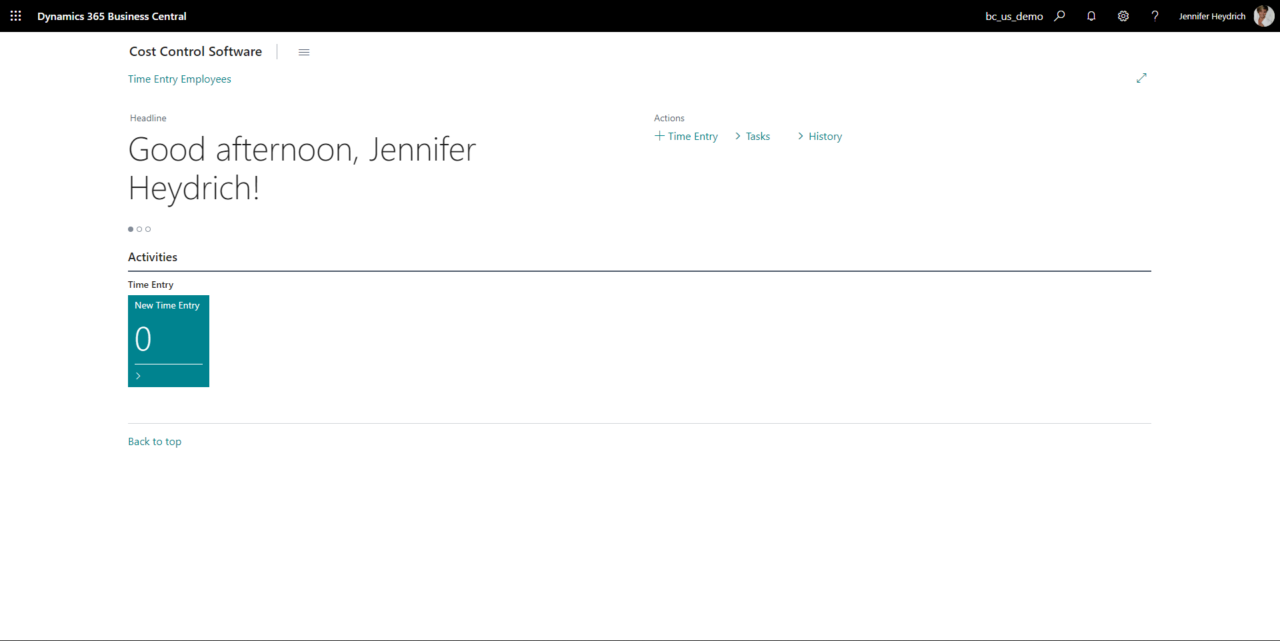
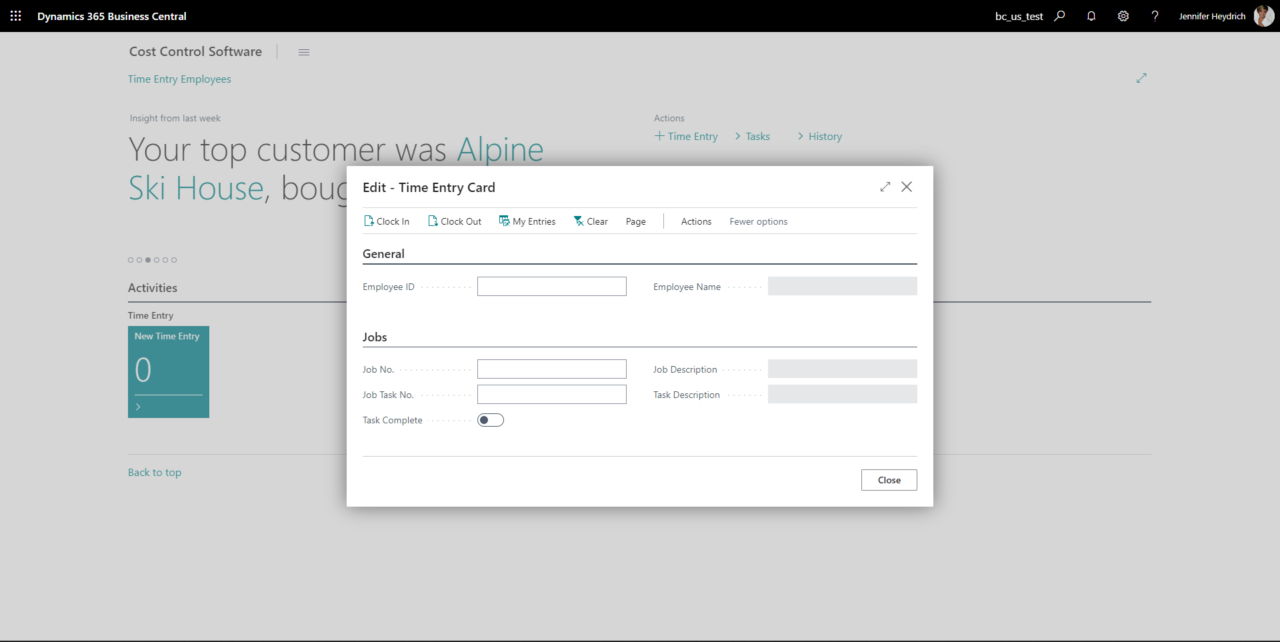
To clock in or clock out, a new time entry needs to be created. Choose the + Time Entry icon on the Time Entry RoleCenter or click on the New Time Entry tile.
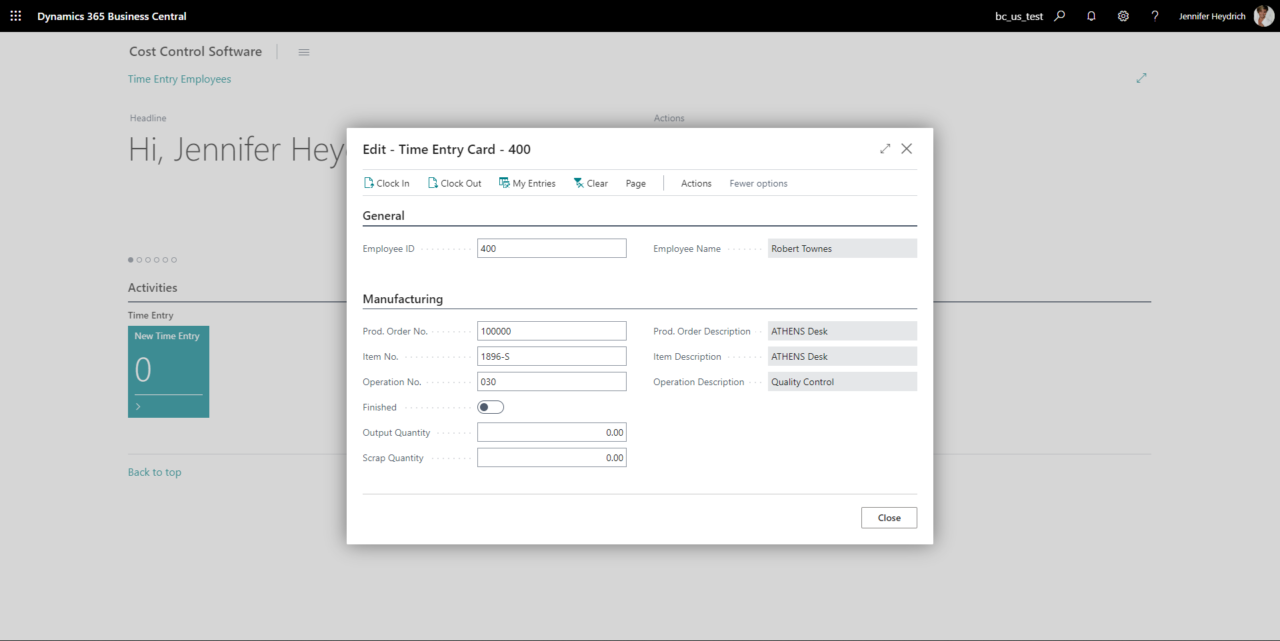
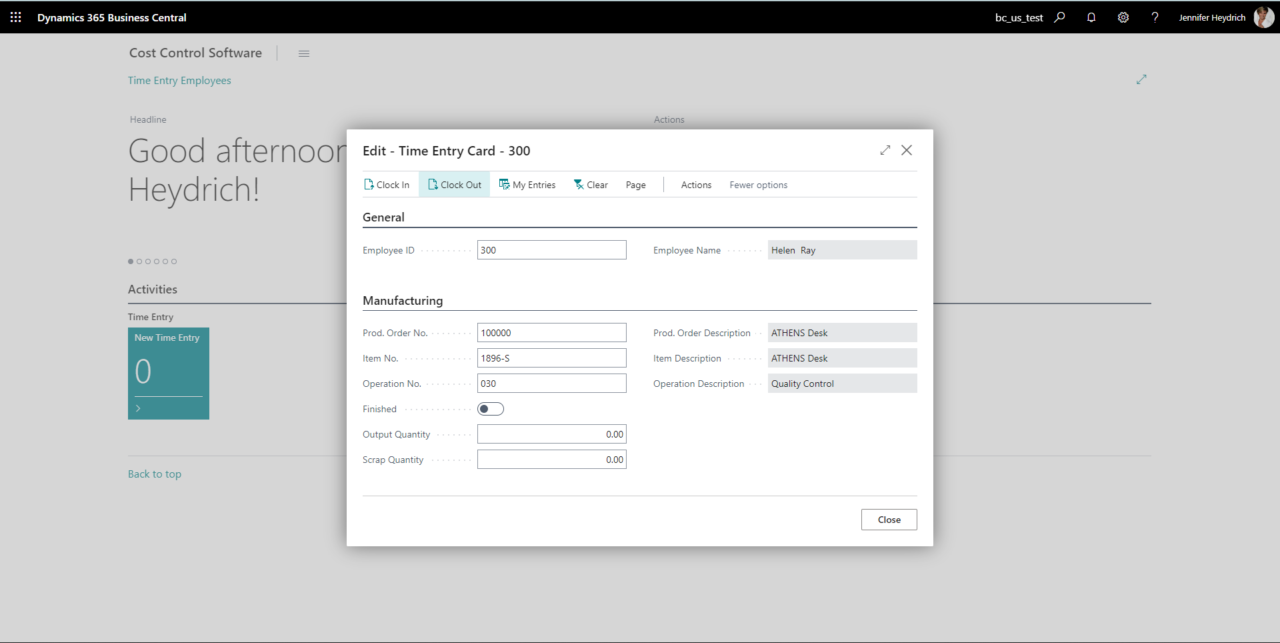
This will open the Time Entry Card, in this case Manufacturing, as choosen in the Setup. To clock-in, scan or enter the employee badge in the Employee ID field, followed by the Prod. Order No., Item No. and Operation. Note: The Item No. will be default to the first order line. To clock-in to another order line, just overwrite it by scanning the barcode on the traveler. Klick on Clock-In, or ‘Enter’ after you have entered all the information.

When Jobs is checked in the Time Entry Setup, the Time Entry Card will be displayed as follows.
Clock-out
In order to close a Time Entry, create a new entry using the New Time Entry tile or + Time Entry option in the RoleCenter. Then scan your badge and the system will pull up the production order that is currently being worked on. To mark the current operation as Finished, the Finished flag can be set. This will prevent employees from clocking in as only unfinished operations can be clocked into.
With Time Entry, it is possible to post output as well as scrap. To do so, enter the respective quantities in the Output Quantity and Scrap Quantity field. This will post output on top of actual hours. To clock-out and close the time entry, select Clock Out. Then the window can either be closed or it can be used to clock-in to the next operation.
Time Approval Worksheet
Each new Time Entry will first be recorded but not posted. With the Time Approval Worksheet, all open time entries can be reviewed and modified if necessary. After they have all been reviewed, they can be approved. Choose either the Time Approval Worksheet icon on the Time Entry Rollout center or select > Task > Time Approval Worksheet. The Total Entered Units cannot be modified, to edit the recorded time, modify the Approved Units. After reviewing all lines, click on Approve to approve all entries at once.

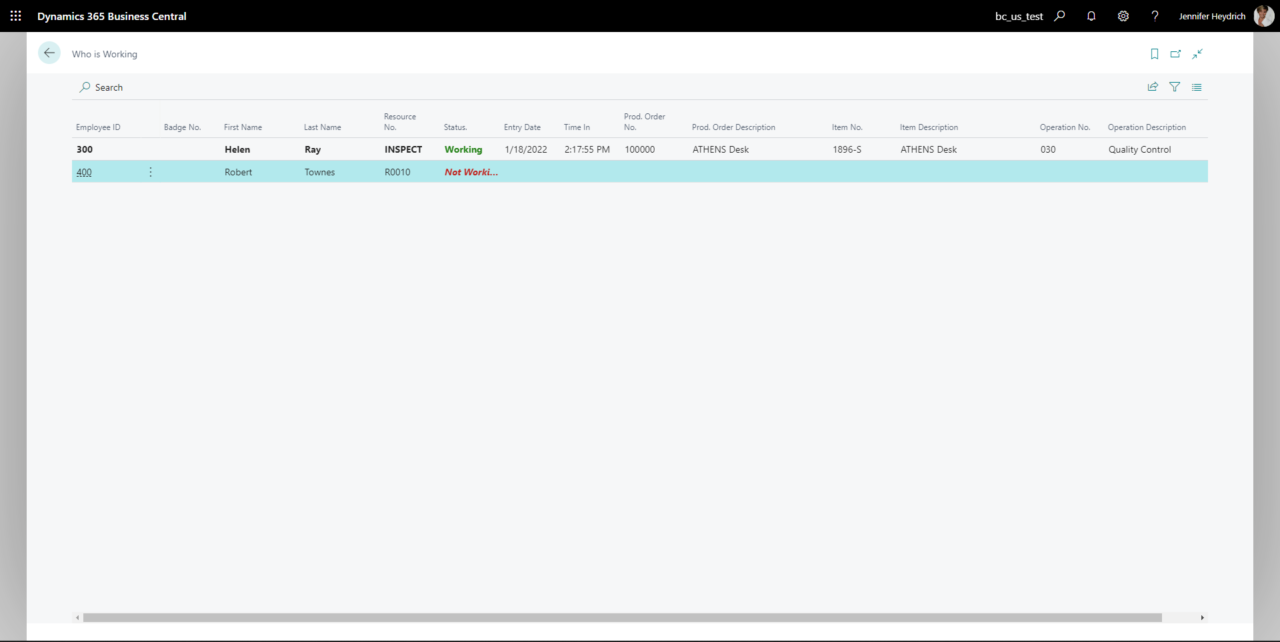
Who is Working
The Who is Working screen shows all employees that have the current user defined as supervisor. For each employee it shows the status and if the employee is working, and what they are working on. Choose either the Who Is Working icon on the Time Entry RoleCenter or select > Task > Who Is Working to show the screen.

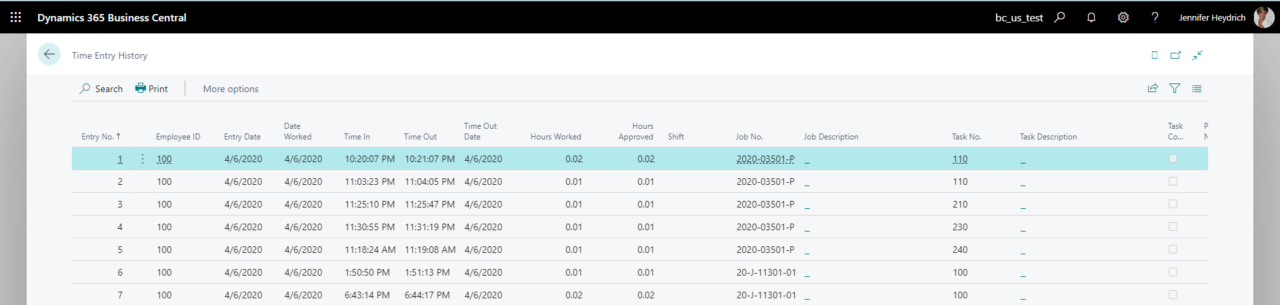
History
Choose the > History > Time Entries icon on the Time Entry RoleCenter. In that screen, you can see all approved entries with related information that have been posted.